
My Agents is a really cool feature you can access with your account at Tochat.be, and can help your team working closer together, more structured and with the same purpose and goals!
With My Agents you can fast and easily add your team members to your Tochat.be account, so that you can assign them to different agents and different widgets, so they can start help you generating leads and increasing the customer service and support!
The benefits of using and mastering My Agents:
- Manage your team better✅
- Get a better look into how your colleagues opperate ✅
- You can better help your team members if they struggle ✅
- They can help you dealing with customers and clients ✅
- You generally become more efficient as a team ✅
- Create more leads by working together ✅
Share access to Tochat.be with your clients
Here we give you a full description of how share access to your Tochat.be account with your clients 🤗
Here is how you add your team members
This video explains very detailed, how you can add your team members to your different agents, in just a couple easy steps.👇
1. login to your Tochat.be account
When you want to add your team members to your account, the very first thing you need to do, is to login to your account, which you can do here. 👈
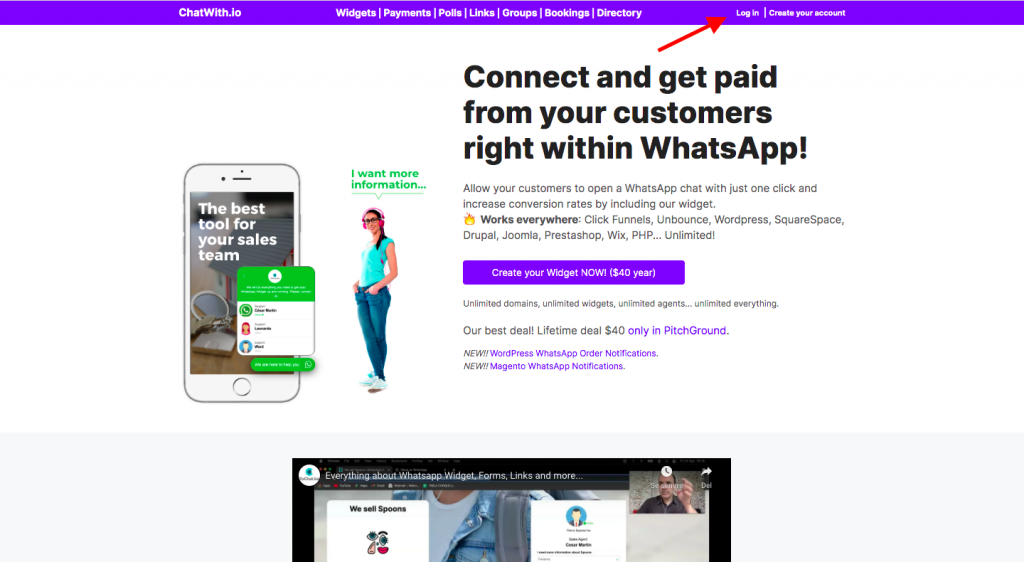
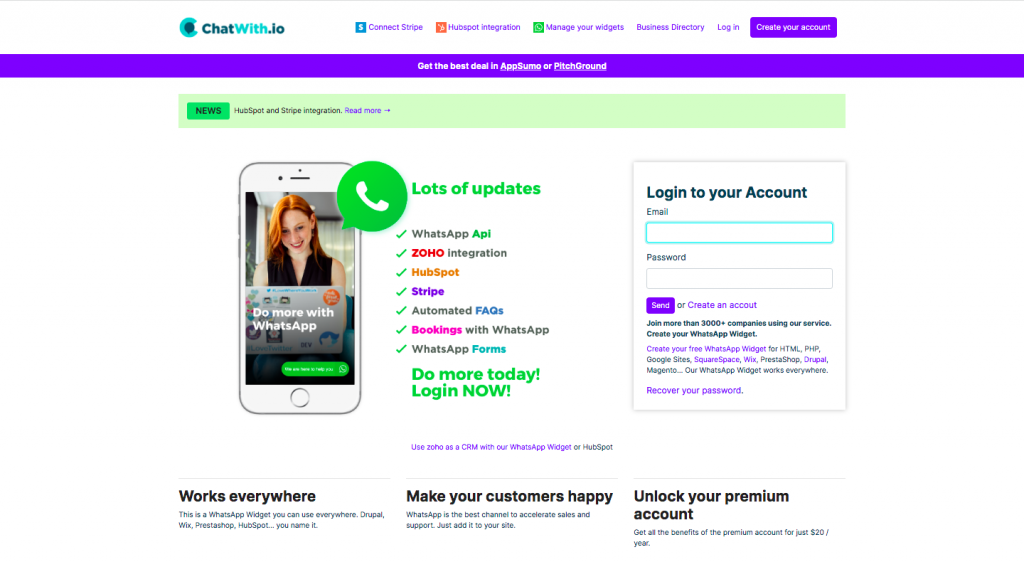
When you press “log in”, as the picture above points too, you will get to the page where you can log in with your Email and password.
If you dont have an account yet, you can go ahead and make one very easily. Making an account is totally free!
2. Go to “My Agents”
When you have successfully logged in to your account, you will see the front page of your account. At the top of the page, there is a toolbar, where you have access to alle the amazing tools that Tochat.be is offering.
Here you will find the tool called “My Agents”, which is where you can add, manage and delete your agents and link team members to different widgets and agents.
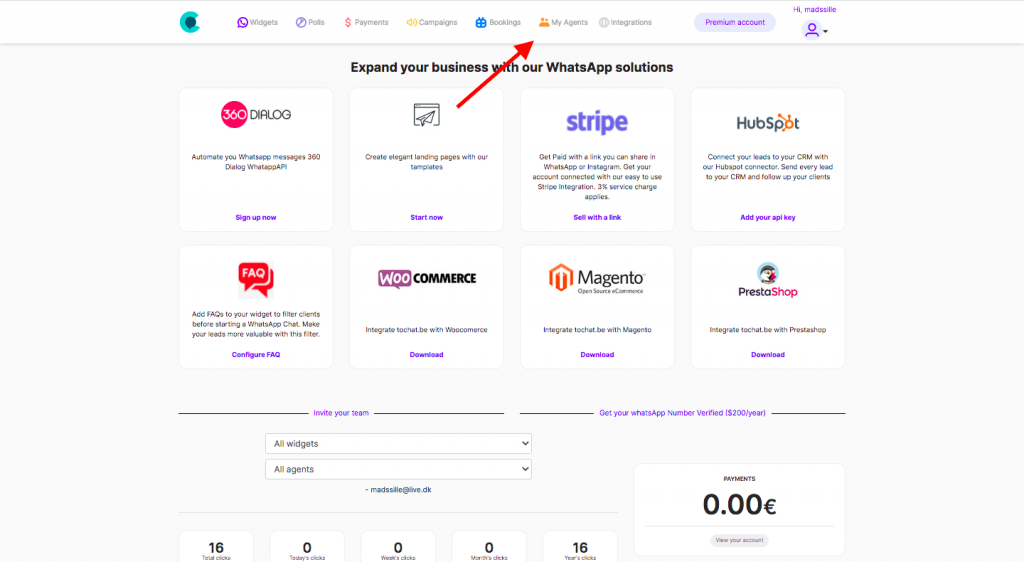
As the picture above shows, it is the little orange icon and the top of your screen, which leads you to the page where you can add, manage and delete agents. 👍
3. Add your team to your account
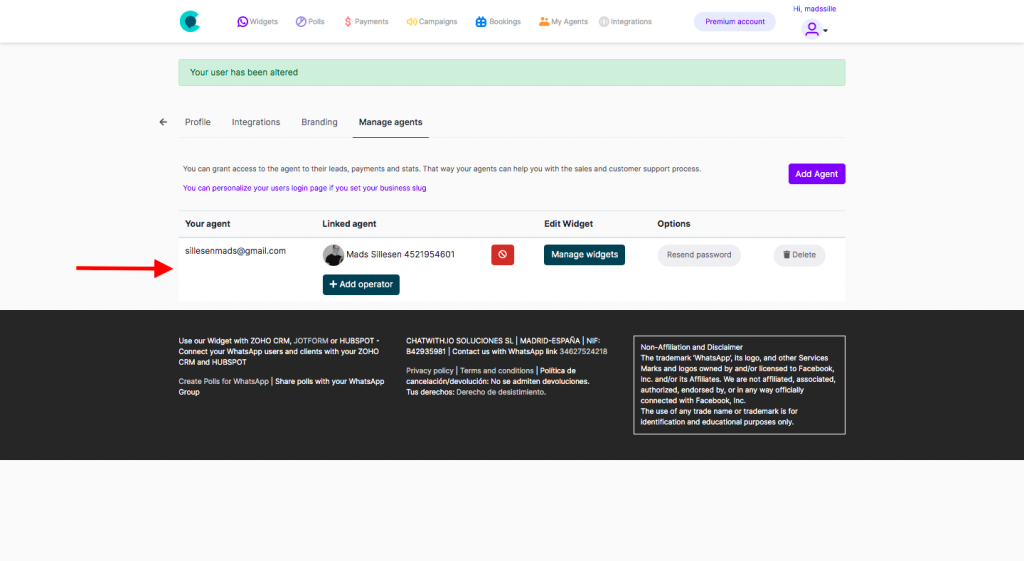
When you have pressed the little orange icon saying “My Agents”, you get to the page where you can add your team members to your account. You can also see existing team members, and the agents they are linked to.
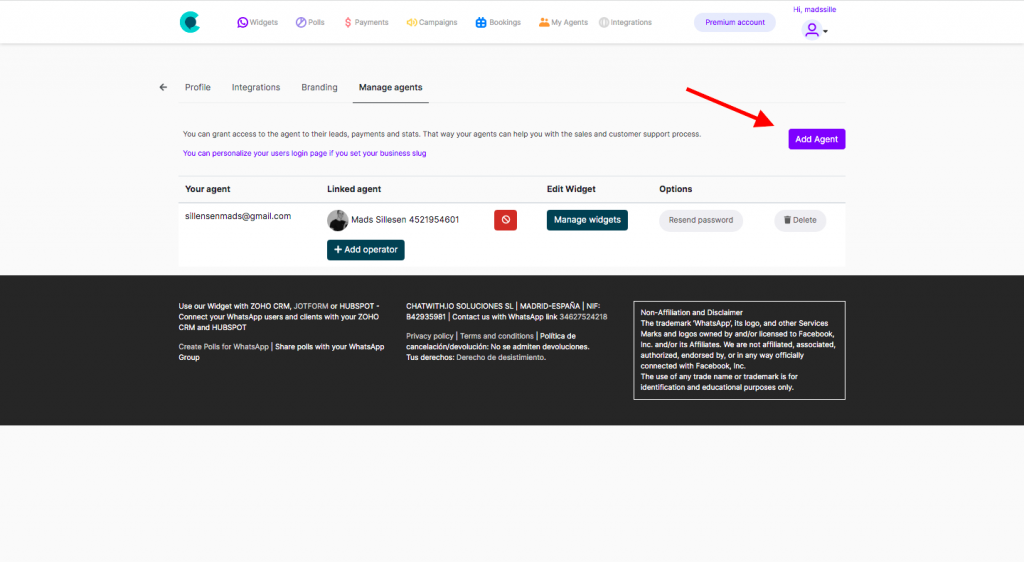
To the right on your screen you will find a little purple button saying “Add Agent”. If you press that, you will be able to add team members to your agents.👏
Now you just need to create a log in for them and give them a password, so they can access the account, which is the next step of the process.
4. Create a profile for your team member
The next step is the part where you need to create a profile for your team members. You do that by adding their email address, and give them their own password, so that they can log in to their account.
There will also be two fields that you can check off, one that says “Enable”, and one that says “Receive emails”. The first one is actually really important, because if you don’t activate this, then their account wont be active, so this one needs to be activated. ⚠️
The second one, the one about the emails is more for your own purpose, so you can activate that if you feel like it, but it is not that important.
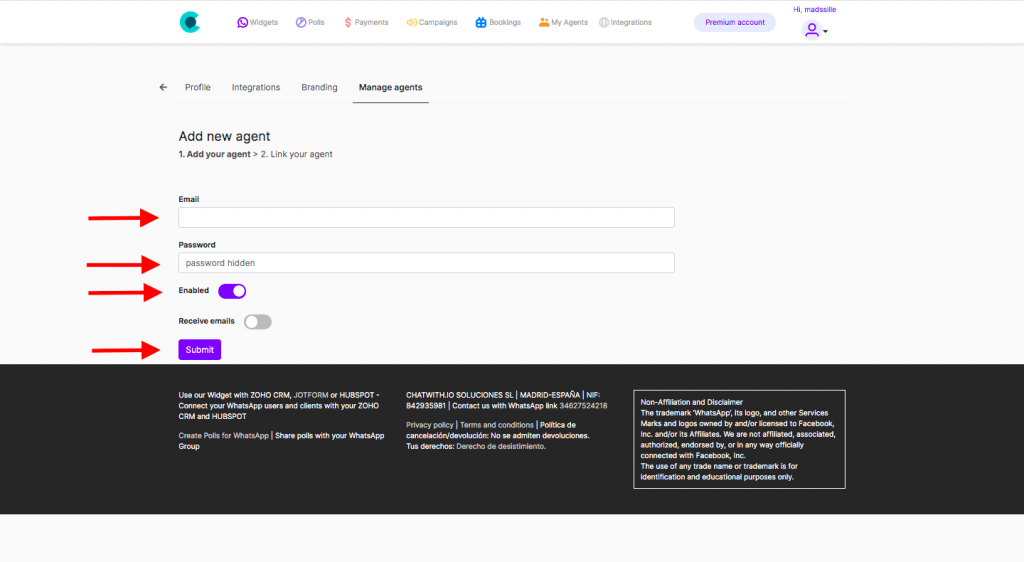
When you have filled it all out and are ready to move on, you simply go ahead and press the “Submit” button at the buttom!
5. Choose an agent
Now you have chosen the team member you want to add to your account, so the next step is now to decide, which agent you want to link this team member too, and which widget they should be linked to.
As soon as you press “Submit”, you will get directed on to the page, where you can see all your widgets and agents, and from here, you can choose which agent you want to link your team member to! 👌
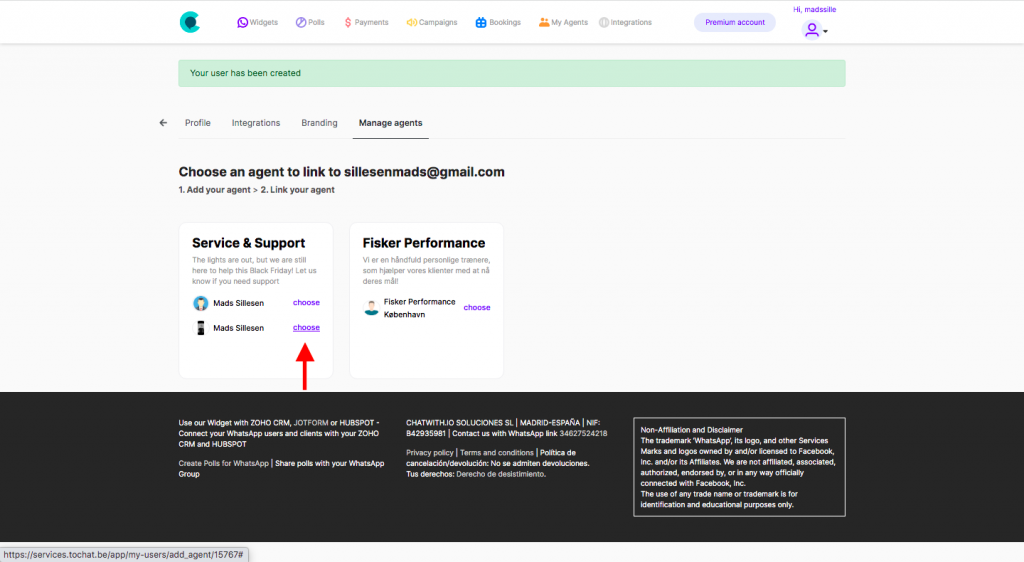
In the example above, you can see that I have two different widgets, and three agents to choose from. I have chosen to link this team member to my service and support widget, and i have chosen the agent called “Mads Sillesen” with a picture, to link my team member to.
So to do it, i simply press “choose”, where the red arrow is pointing, and my team member will now be added to this agent! 👏
So that is how you use “My Agents”, and you can add your entire team to your different agents, by doing this process again, but with different Emails and members.
Now your colleagues are ready to start helping your customers, selling and generating leads on your account! ✊
Share the details with your team
Now there is just one thing left to do, and that is to share the account details that you just created for your new user, with the team member, who are supposed to use them.
This means, that they obviously need to be aware of the email address and the password, so that they can log in to the account and start working.
Another thing that I would recommend doing, is to share the purpose of the WhatsApp widget and the agent that you just added them to, so they are aware of what their goal is when they start working, and also how to approach the task, that you have just handed them. 🚀
Remove your team member
If anything should happen, that means that your team member can no longer take care of the agent, it could be if they resign, get fired or are promoted to other tasks, then you can always remove them from your My Agents!
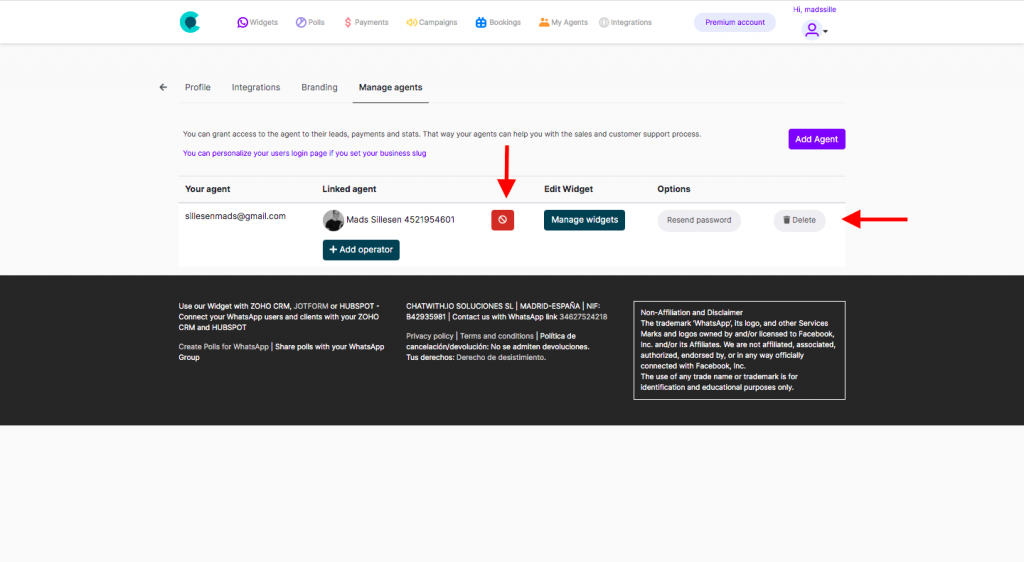
You can do this in two different ways.
The first option is the red arrow to the right, pointing to a button saying “delete”. If you press this, you will remove this user completely, with both the user and the link to the widget and the agent. ❌
The second option is the red arrow pointing the the red button. If you press that red button, you disconnect the linked agent, and you keep the user, which means, that you can simply link the user to a new agent. 🚫
If you have any questions or comments, don’t hesitate contacting us, we are here to help! 🙏